Posted on

Necessity Vest

Necessity Vest

By Chauntel Andreasen

Firebrunette Knitting

Materials Needed:

Size 11 US 24” and 16” circular needles

Chunky weight yarn: 640(710) yards required

Shown in photos: Malabrigo Chunky 4(5) balls in Pagoda

Rowanspun Chunky 4(5) balls in Olive

24” separating zipper

Sizes: S/M (L/XL)

fits 32”-36” (38”-42”)

Notes:

This vest is worked in one piece to the armholes then separated to work the fronts and back separately. The hood is worked by picking up stitches after the shoulders are sewn together.

The zipper can be sewn in either by hand or machine. I prefer to put it in by machine, much faster!

Body Instructions:

  • CO 106(114) sts

  • Work 6” in k2, p2 rib, ending with k2

  • Change to stockinette stitch, knit on the right side (RS), purl on the wrong side (WS), continue until piece measures between 14” and 16”. You have the choice to make it as long or as short as you want. The pagoda vest is 14” to the underarm and the olive vest is 16” to the underarm. I like them equally.

  • Now you will be binding off for the underarms and working the fronts and back separately.

  • Next RS row: k 20(22) for front, BO 13sts for underarm, k 40(44) for back, BO 13sts for underarm, k 20(22)

Front Left Panel:

  • Turn your work and continue working stockinette over the 20(22)sts for 5”.

  • Start neck shaping as follows:

  • On next WS row, BO 4sts, purl to end.

  • Turn and knit to end.

  • Turn, BO 3sts, purl to end.

  • Turn and knit to end.

  • Turn, BO 2sts, purl to end.

  • Turn and knit to end.

  • Turn, BO 1 st, purl to end.

  • Work a further 13 rows and BO all sts.

Front Right Panel:

  • Join yarn on RS of panel.

  • Knit 5” of stockinette over the 20(22)sts as you did for the left front.

  • Start neck shaping as follows:

  • On next RS row, BO 4sts, knit to end.

  • Turn and purl to end.

  • Turn, BO 3sts, knit to end.

  • Turn and purl to end.

  • Turn, BO 2sts, knit to end.

  • Turn and purl to end.

  • Turn, BO 1 st, knit to end.

  • Work a further 13 rows and BO all sts.

Back Panel:

  • Join yarn on RS of back.

  • Knit in stockinette until the back is the same length as the fronts, measuring from BO underarm sts.

  • BO

Sew shoulder seams together; front panels to back piece matching at armhole and seaming in towards the neckline.

Hood:

  • Starting at right front neckline, PU & knit 25(28)sts on right front, 24(26)sts on back, 25(28)sts on left front. 74(82)sts total

  • Turn and beg working in k2, p2 ribbing as follows:

    • (WS) p2, k2 across, end with p2.

    • (RS) k2, p2 across, end with k2.

    Work 1 more WS row.

  • Next RS row work as follows:

  • BO 6sts, work 12 sts, M1, p2, M1, work 14(18)sts, M1, p2, k2, p2, M1, work 14(18)sts, M1, p2, M1, work 18sts.

  • Turn, BO 6sts, work across knitting all k sts and purling all p sts.

  • Continue until hood measures 13”, ending with a WS row.

  • Work a 3 needle BO with RS held together, WS facing out.

Armholes:

  • Join yarn at base of armhole, PU 68sts, join in the round.

  • Work k2, p2 ribbing for 2 rows.

  • BO using knit sts.

  • Repeat on other armhole.

Finishing:

  • Weave in all ends.

  • Soak or wash the vest before sewing in the zipper.

  • Either hand or machine sew in a separating zipper.

You’re finished!! Wear & Enjoy!!

Copyright 2008 Chauntel Andreasen  For personal use only Not for sale or use in items for sale


Posted on

Reversible Project Bag Tutorial

Since so many people liked my simple little bag I thought I would do a little tutorial.

Materials Needed: 2 fat quarters of coordinating fabric (or not, your choice ;o))
2.5 yards 3/8″ or 1/2″ ribbon, cut in 2 pieces 1.25 yards each

Finished size: 7.5″ tall, 13″ wide and 6″ deep

Take one fat quarter and fold it in half, right sides together, so it measures 10.5″ x 19.5″. Square off sides for a more precise sewing edge if you wish.

Sew 2 seams, one down each side.

Turn the top edge down and sew with 3/8″ seam allowance (one side should be the selvedge edge and that is the side I start with for a beginning clean edge).

Next I fold the fat quarter into a diamond shape to make the corners for the square bottom.

Measure up each side of the triangle corner 4″, using a straight edge mark a line across for sewing. Sew a straight line across, do not cut off the excess fabric triangle, it adds stability to the bottom of the bag. Repeat on both corners.

Now you are ready to do the same thing to the second fat quarter.

Once you have both fat quarters done you are going to fit one inside the other, wrong sides together and corner triangles of fabric to the bottom of the bag, matching the corner triangle seams inside.

You will see that the inside layer is sitting higher than the outside layer,

fold that over for your ribbon band.

Sew down using 5/8″ seam allowance, leaving 1/2″ openings at each side seam for you to pull your ribbons through. You may have to fold over a little pleat to take away the excess fold-over fabric.
Note: If you are going to use a larger ribbon you will need to fold down more for the ribbon to be able to fit through.

Starting at one side, draw ribbon through, all the way around coming out the side where you started.

Repeat through the other side. Tie ends and you are done!

You now have a drawstring, reversible project bag!!

Posted on

Single Crochet Beanie Pattern


Single Crochet Beanie  (as seen on my kids in dozens of previous photos)


Materials:

Worsted weight yarn
Size H or I hook
Chain 3, join with sl st
SC 6 in ring
Rnd 1: 2sc in each sc around, mark beginning of round with tail from chain cast on, 12 sts
Rnd 2: *1sc in first sc, 2sc in next sc; rep from * around
Rnd 3: *1sc in 2sc, 2sc in next sc; rep from * around
Rnd 4: *2sc in first sc, 1sc in next 3 sc; rep from * around
Rnd 5: *1sc in 4sc, 2sc in next sc; rep from * around
Rnd 6: *2sc in first sc, 1sc in next 5sc; rep from *around
Rnd 7: *1sc in 6sc, 2sc in next sc; rep from * around
Rnd 8: *2sc in first sc, 1sc in next 7sc; rep from *around
Rnd 9: *1sc in 8sc, 2sc in next sc; rep from * around
Rnd 10: *2sc in first sc, 1sc in next 9sc; rep from * around
Rnd 11: *1sc in 10sc, 2sc in next sc; rep from *around
Rnd 12: *2sc in first sc, 1sc in next 11sc; rep from * around
Rnd 13: *1sc in 12sc, 2sc in next sc; rep from * around
Round 14 until the hat is the desired length: sc in all sts around and around and around
I hope by this point you see the pattern emerging. I usually go to Rnd 13 for a mans hat, Rnd 11 for a youth or womens hat, Rnd 10 for a childs hat, Rnd 9 for a toddler hat and Rnd 8 for a baby hat.
This is more of a guideline pattern, you can make your first hat and then adjust the crown rounds to your desired size adding increases if needed by doing more rounds in the set pattern.
Enjoy!!

Posted on

Beginning Socks Pattern

Beginning socks

Yarn: Nashua superwash creative focus or comparable yarn to match gauge

Needles: 6 US, 4 double point needles

Gauge: 6.5 sts/inch

Sizes: womens 8 (9)

Using long tail cast on, cast on very loosely 36 (40).

– Distribute sts as follows

Needle 1 (N1)- 9 (10), Needle 2 (N2) – 9 (10), Needle 3 (N3) – 18 (20)

– Join in the round being very careful not to twist.

– Start 2×2 rib for leg: k2, p2 around

– Work leg for 3.5 (3) inches

– Heel flap: working back and forth only on N3

Turn work, sl 1 st, purl across

Turn work, sl 1 st, knit across

Continue working those 2 rows until flap measures 2 2/3 inches long. End with a knit row.

– Turning the heel:

Turn work, sl 1 st, p9 (10), p2tog, p1, turn

Sl 1 st, k3 (4), ssk, k1, turn

*Sl 1 st, p to 1 st before gap, p2tog to close gap, p1, turn

Sl 1 st, k to 1 st before gap, ssk to close gap, k1, turn*

Repeat from * to * until all heel flap sts have been worked. End

with a knit row.

– Gusset: move half heel sts to new needle (N1).

PU 15 sts down side with N1 (already has 1/2 heel flap sts).

N2- Knit across instep sts.

Using 4th needle, PU 14sts along heel flap side. Transfer to N3 (already has 1/2 heel flap sts).

Next round start gussett decreases.

Start of round (row) is now center of heel.

Next round: N1- k18, k2tog N2- Knit N3- knit

*Next round: N1- k to 3 sts from end, k2tog, k1 N2- knit N3- k1, ssk, knit to end

*Next round: Knit all sts

– Repeat last 2 * rounds until you have decreased away all gussett stitches and have your original number of sts, 36 (40)

– Continue in stockinette st until foot measures 7 (7.5) inches from back of heel.

– Start toe decreasing:

*Next round: N1- k to 3 sts from end, k2tog, k1

N2- k1, ssk, k to 3 sts from end, k2tog, k1

N3- k1, ssk, k to end

*Next round: knit all sts

-Repeat last 2* rounds until 16 (20) sts remain.

knit N1 sts onto N3

– Now you have 8 (10) sts on N2 and 8 (10) sts on N3.

Graft together with kitchener stitch.

Weave in ends.

Knit second sock.


Posted on

2 Socks on 2 Circs pattern

2 Socks on 2 Circs

Taught by Chauntel

Materials needed:

Yarn: any sport weight yarn, approx. 300 yards wound into 2 separate balls

I am using Kathmandu DK, 2 balls

Needles: 2 24” circular needles in size 4 US

set of dpn’s size 4 US to be used as holders

Darning needle: for kitchener stitch

Gauge: 6 sts per inch

Sock sizes: womens 8”, (9”, 10”) leg circumference

if in doubt work one size smaller so it is snug & not falling down your leg

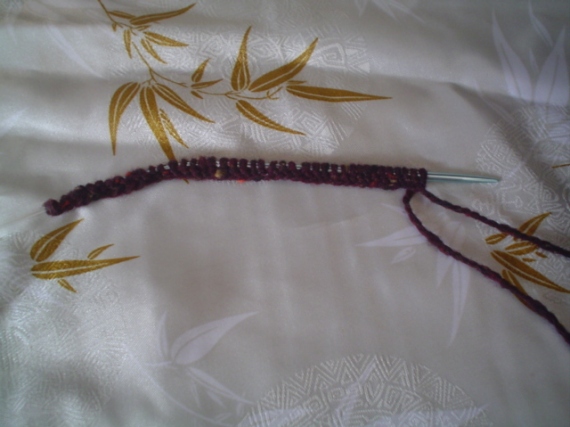
  • Using first ball of yarn, CO 44 (48, 52) sts onto first circular needle.DSC02510

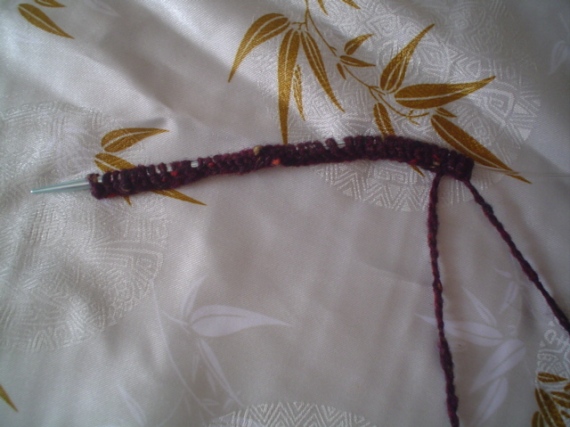
  • Now move the sts to the left end of the needle like this:DSC02511

  • Now transfer half of the sts to the second circular needle and move all sts on both needles down to the right side end, so it looks like this:DSC02513

    Note: Needle 1 (N1) is the needle with the second half of the stitches- without the yarn tail from the cast on, these are the heel sts.

    Needle 2 (N2) is the needle with the half of the sts with the yarn tail from the cast on and the working yarn, these are the instep sts.

  • Position needles in front of you so that N2 is in the back (as show in the picture above), N1 is in front.

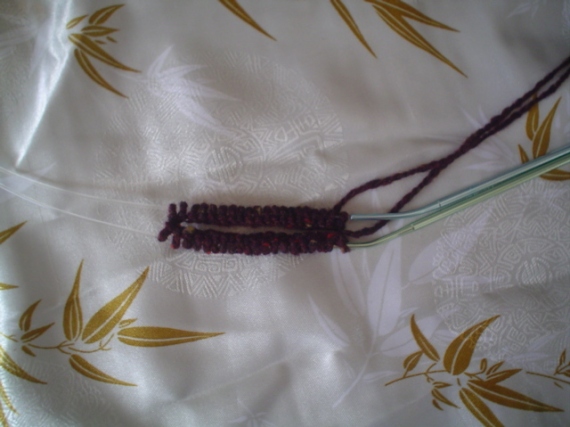
  • Now using the other end of N1, CO 44 (48, 52) sts from the second ball of yarn.DSC02517

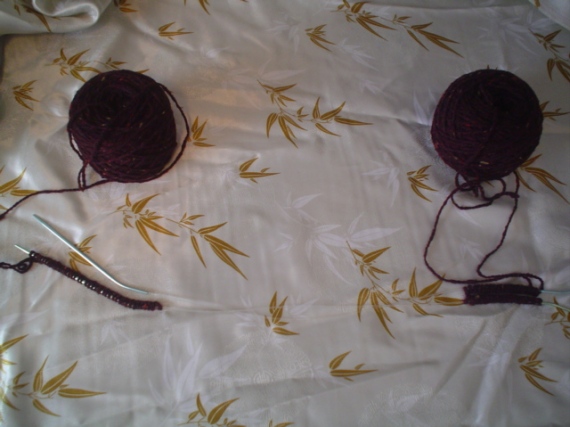
  • Slide half of the sts to N2 just like we did with the first set of sts. Move all the sts onto the cables as pictured below, making sure to keep the cast on edge to the center so you do not get twisted.DSC02520
  • Now, being careful not to twist, join yarn on sock 1 (the sock on the right) using N1as follows: pulling on the left side of N1, scoot the sts onto the right side needle tip. Now pick up the left end of N1 and using these two needles, making sure the working yarn is coming between the two needles not wrapping around either needle, start knitting in 2×2 rib (k2, p2 across).

    Note: N2 is going to hang across the back acting as a stitch holder for the second half of the sock sts.

  • Repeat across sock #2 (the sock on the left).

  • Now turn your work so you can repeat across N2.

    One round is now complete.

  • Continue to turn after working both socks.

    Note: At the start of each ½ round your working yarn should always be on the back needle, right hand side or top-right.

  • Work ribbing for 2”.

  • Switch to stockinette st (knitting all sts around). Work leg for an additional 4” (6” total from cast on edge).

    Heel flap:

  • Using only N1, sl1st, *k1, sl1pw*, rep *to* around, end k1

  • Turn, sl1st, purl across

  • Repeat those 2 rows until heel flap measures 2 2/3”- 3”. End with a purl row.

Turning the heel:

    Now, working one sock heel at a time, we are going to turn the heel and pick up gusset stitches.

  • Hold work with right side facing

  • Starting with sock 1, sl1, knit half of your total heel flap sts 22 (24, 26), ssk, k1, turn

  • sl1, p4, p2tog, p1, turn

  • *sl1, k to 1 st before gap, ssk to close gap, k1, turn

  • *sl1, p to 1 st before gap, p2tog to close gap, p1, turn

    Repeat last 2* rows until all heel sts have been worked, ending with a knit row.

  • Using N1, pick up sts (using the sl st along edge of heel flap).

  • Now move to the second sock, turn heel & pick up sts along one side, the same as with the first sock.

  • Switch to N2, knit across the instep sts of sock 2.

  • Using a dpn, pu sts along other heel flap edge. Leave these sts on the dpn for now.

  • Work across the instep sts on sock 1. Again, pu sts along edge as on sock 2.

  • Using N1, move sts from spare needle over. Knit to center of heel sts, place marker (this now denotes the start of every round).

  • Knit across the heel sts to last 3 sts, k2tog, k1

  • Sock 2, move sts from spare needle to right hand needle. Knit to center, place marker, *k to last 3 sts, k2tog, k1

    Note: now all of your heel sts are back onto N2 and all instep sts are on N1

    Gusset decreases:

  • N2: Knit instep sts on both socks

  • N1: K1, ssk, k across heel sts to marker

    That is the end of a decrease round on sock 1.

  • Still on N1, knit the second half of the heel sts on sock 1.

  • Move to sock 2, k1, ssk, k across heel sts to marker

    That is the end of a decrease round on sock 2.

  • Still on N1, knit the second half of the heel sts on sock 2.

    Note: I know this sounds confusing as to where the decrease round and knit rounds start and finish. Another way to visualize this is to make a diagram of each round.

  • You will continue with these 2 rounds, a decrease round and a knit round until you have decreased away all of your gusset sts and have returned to your original stitch count, 44 (48, 52).

  • Now you can work the feet of the socks in stockinette st until it measures 2” from desired length. Or you can follow the general sizing I give below.

    6 1/2”- womens size 7

    7”- womens size 8

    7 1/2”- womens size 9

    8”- womens size 10

  • Shape the toe in whatever way pleases you most!!!

VOILA!

YOU HAVE FINISHED 2 SOCKS AT ONCE!

PAT YOURSELF ON THE BACK & HAVE A TREAT!

Feel free to visit my blog at

http://firebrunette.wordpress.com

Posted on

Fair Isle Hat Pattern


Fair Isle Hat Pattern

Yarn: Lamb’s Pride Worsted in 3 colors; dark- MC, light- CC1, medium- CC2

Needles: size 8; either 40” for magic loop or 16” and dpn’s

Gauge: 4.5 sts per inch

Sizes: head circumference; childs- 17”, (womens- 21”, mens- 23”)

  • With MC cast on 70 (80, 90).

  • Separate the sts in half and pull needle cord through for magic loop.

  • Moving front sts down to needle tip, have back half with yarn tail & working yarn on back cord, leave a loop on the left side.

  • Using back needle tip, join and start first round; k1, p1 around

  • Rounds 2- 6; *k1mc, p1cc1*, rep around

  • (womens & mens sizes only, kids size skip to round 13)

  • Rounds 7-12; knit MC around

  • Rounds 13- 30; follow chart

  • Rounds 31-34; knit MC (Rounds 31-36; knit MC)

  • Start decrease rounds as follows; *k 12 (14, 16), k2tog * repeat around

  • Knit 1 round

  • * k11 (13, 15), k2tog * repeat around

  • Knit 1 round

  • * k10 (12, 14), k2tog * repeat around

  • Knit 1 round

  • * k9 (11, 13), k2tog * repeat around

  • Repeat in this sequence of decreasing until you have about 5 sts left, cut yarn & draw through all sts, pull tight and weave in ends.


30
29

28
27
26
25
24

23
22
21
20
19

18
17
16
15
14
13
MC Dark
CC1 Light
CC2 Med

~2~

Designed and written by Chauntel Andreasen

Not to be used without express permission.

Posted on

Magic Loop Baby Hat Pattern

Magic Loop baby hat

Using size 8 US needle at least 32″ long and worsted weight yarn,

Cast on 44 sts, separate in half onto the 2 needle points.

Join in the round and start 2×2 rib or seed stitch.

Continue ribbing for 1 inch.

Start stockinette stitch, work until hat measures 3.5 inches.

Start decreasing cap as follows:

*k10, k2tog* rep from * to * around.

Knit next round.

*k9, k2tog* rep from *to* around.

Knit next round.

*k8, k2tog* rep from *to* around.

Continue decreasing in this manner until you have 8 sts left.

Cut yarn and draw through remaining sts, pull tight to close.

Darn in ends.

Posted on

Free Pattern~ Gift wine bottle Cozy

Gift Wine Bottle Cozy

Yarn: Noro Silk Garden, 1 ball

Needles: size 5 Knitpicks 40″ circular

Gauge: 5 sts/inch

Method: Magic Loop

Using long tail cast on, CO 40 sts, join and start twisted rib 1×1 as follows: *k1tlb, p1* around

Work twisted rib for 1.5″.

Next round- *yo, k2tog* around

Next round- return to twisted rib 1×1. Work until piece measures 3″.

Switch to stockinette stitch, knitting all sts around.

Work until piece measures 11.5″ from cast on edge.

Form a ridge by using left needle to pick up the purl bump of the next stitch, 5 rows below. Knit this stitch together with the next st on left needle. Repeat around the row.

Bottom shaping- *k2togtbl (knit 2 together through back loop), k2tog* repeat around

Knit next round.

Repeat last 2 rounds 2 more times. Cut yarn and draw tail through remaining sts.

Darn in all ends, make length of cord for tie at neck of bottle by either making 14″ i-cord or twisting the yarn back on itself to make a length of cord. Thread through the yo holes around the neck and tie.

Posted on

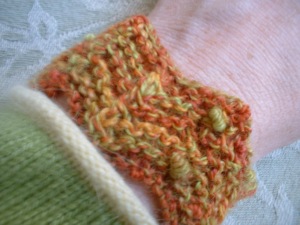
Peaked bracelet pattern

boutone buttons

Finished length– 7.5 inches

Yarn– about 30 yrds of handpaintedyarn boutone wool in color liquidamber

OR

Any other fingering/heavy fingering weight yarn

Needles– US size 3

Gauge– 28 sts and 27 rows= 4 inches  over pattern

double decrease- Sl 2 knitwise together, k1, pass 2 slsts over k1.

double increase- (k1,yo,k1) all in the same st.

Pattern stitch

Row 1- k1, ssk, *k9, double dec: rep from*, end k9, k2tog, k1.

Row 2- k2, *k4, double inc, k4, p1;rep from *,  end k1.

Repeat rows 1 and 2 for pattern.

Bracelet instructions~

Cast on 63 sts.

Following pattern stitch rows above start with row 1, follow pattern rows until bracelet measures desired height. End with row 2.

Bind off, knitting all stitches across as you bind off. Do not bind off in pattern.

Sew on 2 small buttons that will slide through the edge garter stitches.
Sew in ends & voila! Fini

If you wanted, you could add a watch face similar to the Boogie time watch/bracelet on knitty.com.

boutone bracelet

Posted on

FREE felted bag pattern

To all those who have asked for it, here it is:

Striped felted bag pattern

Circular needles size 10, 24inch

Patons Classic Wool Merino -1 skein each of desired colors for stripes


  • Cast on with color A (double strand) 60 sts
  • Work in garter stitch for 30 rows
  • Drop one strand of yarn, you will now be working with 1 strand
  • Pick up 24sts on left side place marker
  • Pick up 60 sts on back side Place marker
  • Pick up 24 sts on right side place marker
  • Work pattern as follows:
  • Knit to 2 sts before marker, p1, k1,move marker, p1

Stripe pattern:

  • B 8 rows
  • C 6 rows
  • D 2 rows
  • E 4 rows
  • B 1 row
  • D 4 rows
  • C 2 rows
  • E 2 rows
  • B 4 rows
  • A 1 row
  • B 1 row
  • C 4 rows
  • D 2 rows
  • E 6 rows
  • B 4 rows
  • C 2 rows
  • D 8 rows
  • E 2 rows
  • B 8 rows
  • C 4 rows
  • D 2 rows
  • E 4 rows
  • A 2 rows – Bind off on the second row

Now you can felt the bag, block while drying & put on handles.


Enjoy!!